
Last week, I revealed that I recently bought a house and am in the process of converting its basement rec room into a proper home theater. As anyone who’s done this before will tell you, before you can build something new, you have to tear down the old. This is actually the fun part.
I’ll direct you back to the first post in this series for photos of what the basement (which had a finished room built back in the 1950s) looked like when Mrs. Z and I bought the house. It had rather ugly wood paneling and a drop ceiling. It was an acoustical nightmare with bad echoes everywhere, and no sound isolation from the rest of the house. I can hear every footstep from the floor above, and can hold a conversation with my wife from the basement to the kitchen without hardly raising my voice. That will need to be addressed. We’ll get to that, hopefully soon.
First, I’ve got to pull out all the old crap that I don’t want in there. With help from my father-in-law, we spent the weekend ripping out the walls and ceiling. Here are some photos of what it looks like now.


We removed all the tiles from the drop ceiling, but for the time being, have left the strapping in place.

However, after a consultation with a soundproofing expert, I was advised not to install another drop ceiling. I will get better sound isolation if I put in two layers of drywall up there. If we’re going to do that, it will probably be best to remove the strapping and attach the drywall directly to the joists, in order to reclaim a slight bit of height. (The basement has a very low ceiling.)
One potential problem with doing that is the presence of an electrical conduit and a pipe that are currently below the joists, flush with the strapping. I have to talk to my electrician and plumber about whether those can be moved.

The floor is covered with ugly green vinyl tiles. Rather than refloor the room, my plan was simply to cover it with carpeting.

While we were doing the demo, Mrs. Z attempted to do some laundry in the next room. After she turned on the washer, we discovered water soaking up from beneath a spot on the floor. Apparently, we have a leak under there. Fortunately, the water stopped and subsided when the laundry was done, so this isn’t an emergency, but I definitely need to get a plumber in there to take a look. I suppose it’s a good thing that we found this before installing any carpeting.
Another fun discovery, we found a couple of very old, petrified mouse carcasses behind the walls. They appear to have been dead for quite a while, and we didn’t see any evidence of current infestation.

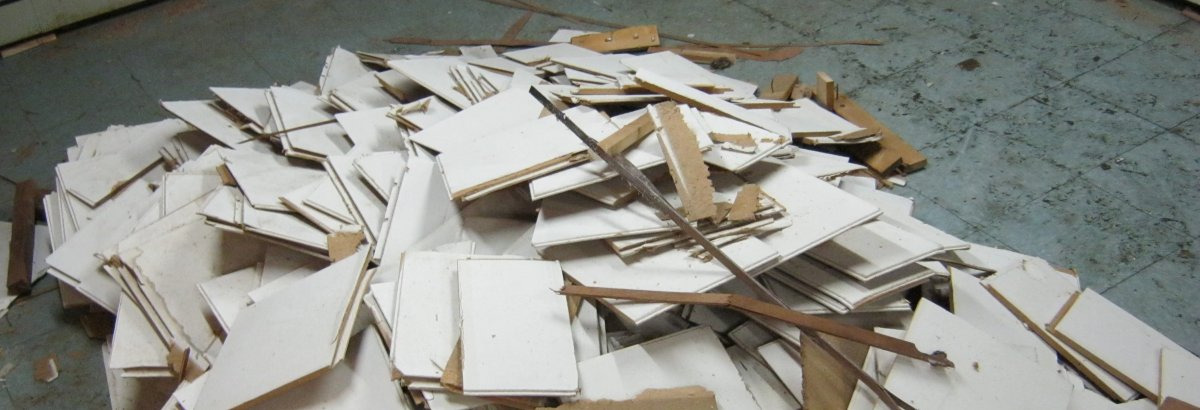
At the end of the tear-down, we were left with quite a mess on the floors.

A few more hours of clean-up got that under control.


As a new homeowner, I found it kind of cathartic to destroy the old room myself. It’s also rather fascinating to see inside the guts of the house.
While we were able to do this part ourselves to save a little money, I have to hire actual professionals for the build-out. I’m still working on finding the right contractors for that.


nelll
Man this look promesing. Can’t wait to see it done. Please hurry. (joke). 🙂
Mike D.
You will be sorry if you do not install soundproofing insulation between the rafters. It works better than two layers of sheetrock. By not installing the second sheetrock layer you can leave the strapping up and leave the electrical as is.
Barsoom Bob
Make sure you fill the spaces between the joist with some insulation, the more the better, to help eliminate sound transfer in both directions before installing the sheetrock to the ceiling.
After you have laid in your wiring for audio video purposes and an electrician, if needed, has set up your lighting, power outlets and switches where you want them, you can sheetrock the walls yourself and save a lot of money by not hiring a contractor for that. It is fairly easy to do and is not that exacting a job. Use big solid pieces where you can, get the seams close but it is not that precise a task.
The critical part is the taping, spackling and painting. Hire a good professional painter for this, it is an art that takes a long time to master correctly. Done properly all the seams will disappear and you will have beautiful, smooth walls. Since this is a basement, you should paint the walls with a moisture lock paint or glue up vapor barrier insulation before installing the sheetrock.
Good Luck
JM
Excellent destruction porn!
Are you installing any special wiring for internet / video streaming?
Josh Zyber
AuthorYes, my electrician’s going to wire all that in for me.
William Henley
Instead of moving the electrical outlet and pipe, wouldn’t it be a better idea to add a layer of insullation and then attach the drywall to the strapping? This way, you get a layer of insullation, and you don’t have to relocate anything.
It may also be a good idea to run your wiring before you install your drywall.
Josh Zyber
AuthorInsulation goes above and between the joists, not below.
William Henley
Oh, its kinda hard to tell what’s going on in a 2D picture. Looked like that would work from how I was looking at the picture.
jonstamos
Josh, please see the Building Science’s recommendations on proper insulation of basements so that you don’t have future mold or moisture problems (specifically see their basement renovation report). In short, fiberglass and vapor barriers are not recommended. A polystyrene system using furring strips is easy to install, and would give you additional floor space compared to your existing setup. Dow’s Wallmate product is a good example.
Josh Zyber
AuthorUnfortunately, I’ve been advised that foam insulation is terrible for my sound isolation concerns. The basement doesn’t seem to have much of a moisture problem (it’s an old house, so surely something would have developed by now), and the framing is separated enough from the foundation wall that I’m not overly concerned about this right now.
Scott J.
Two coats of Drylok on the walls is a great insurance policy against foundation wall leaks, and I highly recommend it! It looks like the walls were painted, which would present a problem with the Drylok adhering properly. I also put two coats of Drylok floor paint on the concrete floor before carpeting it, as I wanted to get as much moisture sealed out as possible. It’s amazing how many tiny cracks a concrete floor has!
Municipalities differ on how they want insulation done in a lower level. Some require a vapor barrier between the insulation and the foundation, some require it between the insulation and the drywall, some don’t want any, and some don’t care. You don’t have much choice but to follow your local building code, if it specifies something. We put a 1″ gap between the studs and the foundation wall so that the foundation had some room to move air, should any moisture get in there. A foundation wall that old will not likely be perfectly straight anyway, so the gap allows you to make it plumb.
I used the white formaldehyde-free fiberglass batt insulation, but if I were to do it again, I would use Roxul in the ceiling and any interior walls. It’s much more dense than fiberglass, so it’s an excellent sound deadener. Plus, there’s no organic material, so no mold, and it’s also fireproof.
Caulking the corner joints (floor-wall, wall-ceiling, and inside corners) with acoustical caulk will also help with sound transmission. If you have drain piping in the area that your theater will be in, replace it with cast iron, black ABX, or wrap it in sound deadening material of some kind. We have a toilet drain pipe right over our seating area, and the standard PVC allows the drain water to be heard if it’s quiet in the room.
Daniel
I finished my basement a few years ago and included a home theater room. I used cotton insulation (made from recycled jeans, and very green) all around and in the ceiling. I so used 1/8 inch rubber (?) acoustical matting around the perimiter walls, and green glue tape (http://www.tmsoundproofing.com/gasket-tape.html) on all the studs to separate the drywall from the studs. I also used acoustical caulk around door seams, outlet boxes, etc. I did use acoustical drop ceiling tiles, I forget which ones they were, but I special ordered them because they had high noise insulation properties. After it’s all done, you can play a movie fairly loud (5:1 system) and not here much at all on the first floor. Before, you could here people talking in the basement. Also, if you have doors, don’t get the hollow doors, spend the extra and get solid fiber filled doors. My basement was poured cement walls, no framing when I started, now it looks and sounds great (the bar with granite countertop and 3-tap system also helps!)
Erich
To the person who recommended bat insulation INSTEAD of double drywall, please ignore this person. I have done extensive reading on the subject of sound insulation, and these two methods address different frequency ranges. 2 layers of drywall adds heavy mass, which helps absorb low frequency sound (bass). Ensure you alternate the seams of the drywall so the sound can’t move through the crack. also use thick 5/8″ drywall, though some experts say one 1/2″ and one 5/8″ sheet will absorb more frequency spectrum. Batting insulation helps absorb medium-high frequency sound, and has far less effect on low frequency sound. both are necessary for a good result. It’s too bad your ceiling is so low, because you have to mount the drywall directly to the studs. It would be much better to be able to hang the drywall from hangers so it would be decoupled from the upper floor entirely. you’ll still be MUCH better off than you are right now though.
Josh Zyber
AuthorI plan to go over this more in a later post, but the ceiling will be decoupled from the joists. My contractor will put blocking between the joists. Sound clips and furring channels are mounted to the blocking, then the drywall (two layers) will hang just below the joists. I’ll lose a little headroom, but will still have enough to stand.
The ceiling will get one layer of 5/8″ drywall and one of 1/2″. The walls will have two layers of 5/8″. Green Glue between the layers.